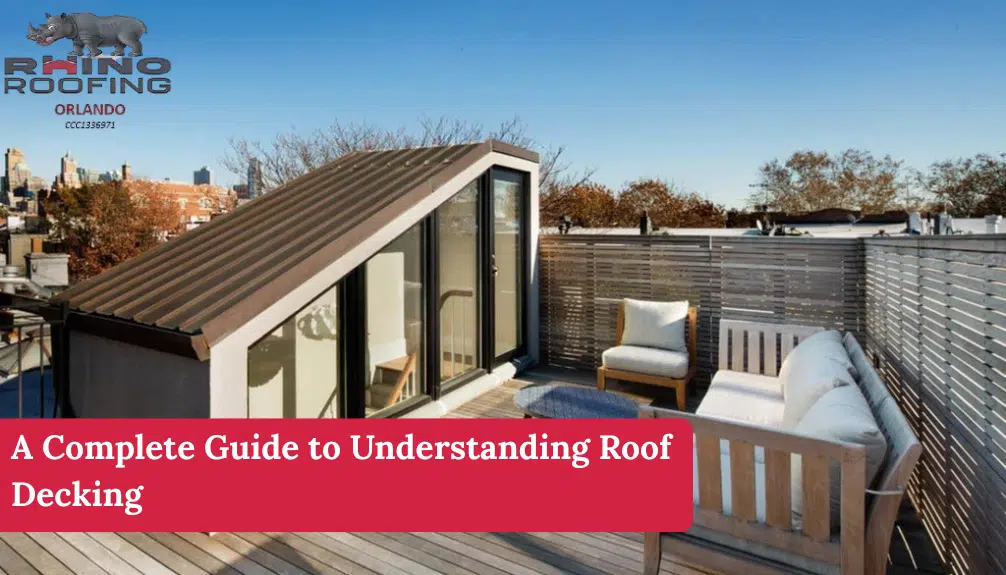
Adding a skylight is a smart way to brighten your living space and improve airflow inside your home. Many homeowners in Medford look for practical guidance on how to install a skylight without causing roof damage. Because Oregon’s climate includes steady rainfall and seasonal temperature shifts, careful planning and proper sealing are essential. This guide explains each step clearly so you can approach roof skylight installation with confidence.
Things to Know Before You Install a Skylight
Before cutting into your roof, it is important to evaluate structure, materials, and local requirements. Installing a skylight affects framing, waterproofing, and insulation layers. Understanding these factors helps prevent leaks and structural weakness. Preparation is the key to a long lasting and energy efficient result.
Check Your Roof Type and Pitch
Your roof’s material and slope determine how easy it will be to proceed. Asphalt shingles are typically simpler for fitting a skylight, while metal or tile roofs require specialized flashing systems. Proper slope ensures water drains correctly and reduces leak risk. If you are unsure about compatibility, it may be wise to hire a roofer for professional evaluation.
The first step in learning how to add a skylight is evaluating your roof.
- Asphalt shingle roofs are the easiest for fitting a skylight
- Metal and tile roofs require specialized flashing
- Roof pitch must meet the skylight manufacturer’s minimum slope requirements
Most skylights work best on roofs with a slope of 15 to 60 degrees. A proper pitch ensures water drains away instead of pooling around the unit.
Understand Local Building Codes in Medford
Building regulations may require permits before modifying your roof structure. Some projects need inspections, especially if rafters are adjusted. Meeting local code ensures safety and avoids issues during resale. A professional contractor familiar with roof installation standards can simplify this process.
Choose the Right Type of Skylight
Different skylight styles serve different purposes inside your home. Fixed units provide light only, while vented models improve air circulation. Tubular skylights work well in small or narrow areas. Selecting the right option depends on your lighting goals, roof design, and existing residential roof types on your property.
Tools and Materials Needed for Roof Skylight Installation
Having the proper tools ensures a smoother installation process. Basic carpentry tools such as saws, drills, and measuring devices are necessary for cutting and framing. Safety equipment like harnesses is also critical when working at height. Using manufacturer recommended flashing kits and waterproof membranes will help protect the roof decking and prevent moisture damage.
If you are serious about learning how do you install a skylight, having the proper tools is essential.
Basic Tools:
- Measuring tape
- Chalk line
- Circular saw
- Reciprocating saw
- Drill and screws
- Utility knife
- Pry bar
- Safety harness
Materials:
- Skylight unit
- Manufacturer flashing kit
- Ice and water shield membrane
- Roofing nails
- Shingles for replacement
- Lumber for framing
Using a skylight specific flashing kit is critical. This component prevents leaks and ensures proper drainage.
Step by Step Guide on How to Install a Skylight
Understanding how you install a skylight begins with careful measurement and framing. Each stage must be completed accurately to maintain structural strength. Rushing through steps increases the risk of leaks or misalignment. Below is a simplified breakdown of the process.
Step 1: Mark and Measure the Opening
Start from inside your attic or ceiling to mark the desired location. Ensure the skylight fits between rafters when possible to avoid structural changes. Measure carefully and double check manufacturer specifications. Accurate marking prevents costly corrections later.
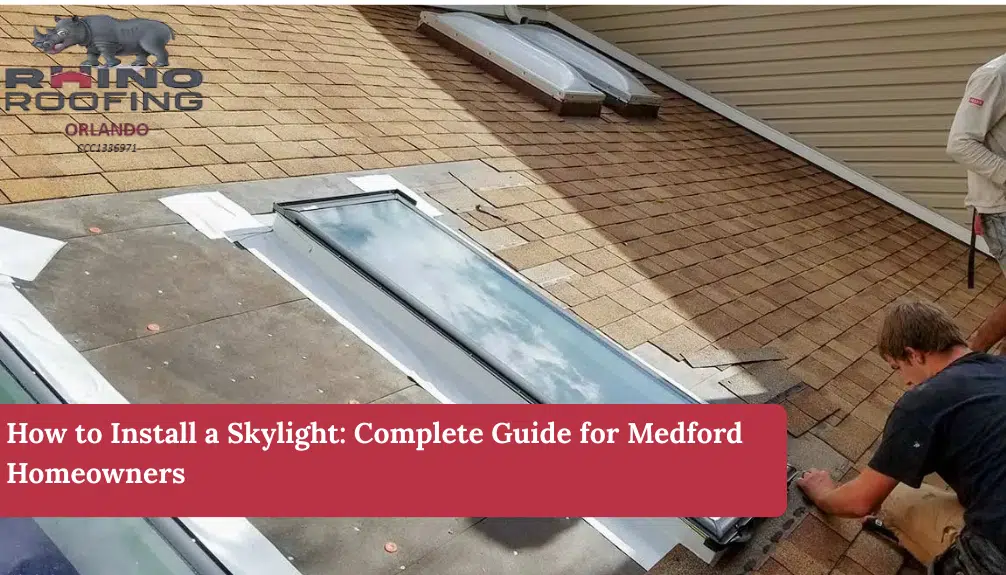
Step 2: Remove Shingles and Cut the Roof Opening
Carefully remove shingles around the marked area before cutting into the roof decking. If you are unsure what roof decking, it is the structural layer beneath shingles that supports roofing materials. Cut only along the measured lines and avoid damaging surrounding materials. Controlled cutting protects overall roof integrity.
Step 3: Frame the Opening
Framing reinforces the opening and supports the skylight unit securely. Install headers where necessary to maintain load distribution. Solid framing prevents sagging and ensures the skylight sits evenly. Structural stability is critical for long term durability.
Step 4: Install the Skylight Unit
Place the skylight into the framed opening and align it properly. Secure it using manufacturer recommended fasteners instead of relying on sealant alone. Proper placement ensures a tight fit and reduces water intrusion risk. This is a crucial part of fitting a skylight correctly.
Step 5: Install Waterproofing and Flashing
Apply an ice and water shield membrane around the skylight perimeter before installing flashing. Flashing should be layered correctly from bottom to top to guide water away. Replace shingles carefully around the unit to complete the seal. Effective waterproofing prevents situations where a roof coming off a house becomes a costly emergency due to moisture damage.
Common Mistakes When Installing a Skylight
Many homeowners underestimate the importance of proper flashing and sealing. Skipping waterproof membranes can lead to hidden leaks that damage insulation and framing. Incorrect framing adjustments may weaken roof support. Poor workmanship can also impact overall roof repair needs in the future.
DIY vs Professional Skylight Installation in Medford
While some homeowners feel confident handling minor roofing projects, skylight installation involves structural and waterproofing expertise. If your roof has a steep slope or complex design, professional support is safer. Attempting major modifications without experience may result in higher roof repair costs later. In some cases, hiring experts costs less than fixing mistakes.
Cost of Adding a Skylight in Medford
The total cost depends on skylight size, roof complexity, and labor rates. Materials may range from a few hundred dollars to over a thousand for advanced models. Labor costs vary based on structural changes and finishing work. When planning improvements, it also helps to understand the average cost of new roof projects to compare long term investment decisions.
Maintenance Tips After Installing a Skylight
Routine roof inspection ensures your skylight performs well for years. Check seals, flashing, and surrounding shingles twice a year. Keeping debris off the roof improves drainage and reduces stress on materials. Regular maintenance of roof components supports overall durability and prevents costly structural repairs.
Benefits of Adding a Skylight to Your Home
Skylights significantly increase natural light, reducing dependence on artificial lighting. They can improve airflow and help regulate indoor temperature. Properly installed units add aesthetic appeal and may increase resale value. With correct roof maintenance, skylights remain an asset rather than a liability.
Is Installing a Skylight Worth It for Medford Homeowners?
For many homeowners in Medford, installing a skylight is a worthwhile upgrade when done properly. It enhances interior brightness and improves overall living comfort. However, careful planning and professional level waterproofing are essential. A well installed skylight should integrate seamlessly with your existing roofing system.
Frequently Asked Questions
- How long does it take to install a skylight?
Most standard skylight installations take 4 to 8 hours depending on roof complexity. - Can I install a skylight on any roof type?
Most roof types allow skylights, but slope and material determine installation method. - Do skylights increase energy efficiency?
Yes, modern energy efficient skylights reduce lighting needs and improve ventilation. - How do you prevent leaks after installing a skylight?
Proper flashing and waterproof membrane installation are essential to prevent leaks. - Is a permit required to add a skylight in Medford?
In many cases yes, especially if structural framing is modified. - How much does roof skylight installation usually cost?
Costs typically range between $800 and $3,500 depending on size and labor.
Final Thoughts
Learning how to install a skylight requires patience, precision, and proper waterproofing techniques. If you are uncertain about structural framing or flashing installation, consulting professionals can protect your investment. Rhino Roofing Orlando understands the importance of quality roof installation and long term durability.
Rhino Roofing Orlando also advises homeowners to consider future roof maintenance needs before starting structural upgrades. When done correctly, a skylight becomes a beautiful and functional addition to your home.
For dependable craftsmanship and roofing expertise, Rhino Roofing Orlando is committed to delivering reliable solutions that protect your property for years to come.
Romail Shah is a content strategist and web authority expert who works with Rhino Roofing Orlando’s licensed roofing team to create accurate, trustworthy guides on residential and commercial roofing in Central Florida. His article reflects real expertise and Florida-specific roofing standard